Love for Outdoor Kitchens

Landscape Design

Hot weather has come to New England, and we, of course, want to spend as much time as possible outdoors. And we certainly don’t want to heat up our kitchens and our houses while we cook. A great way to remain part of the summer fun and help beat the summer heat is to install an outdoor kitchen.

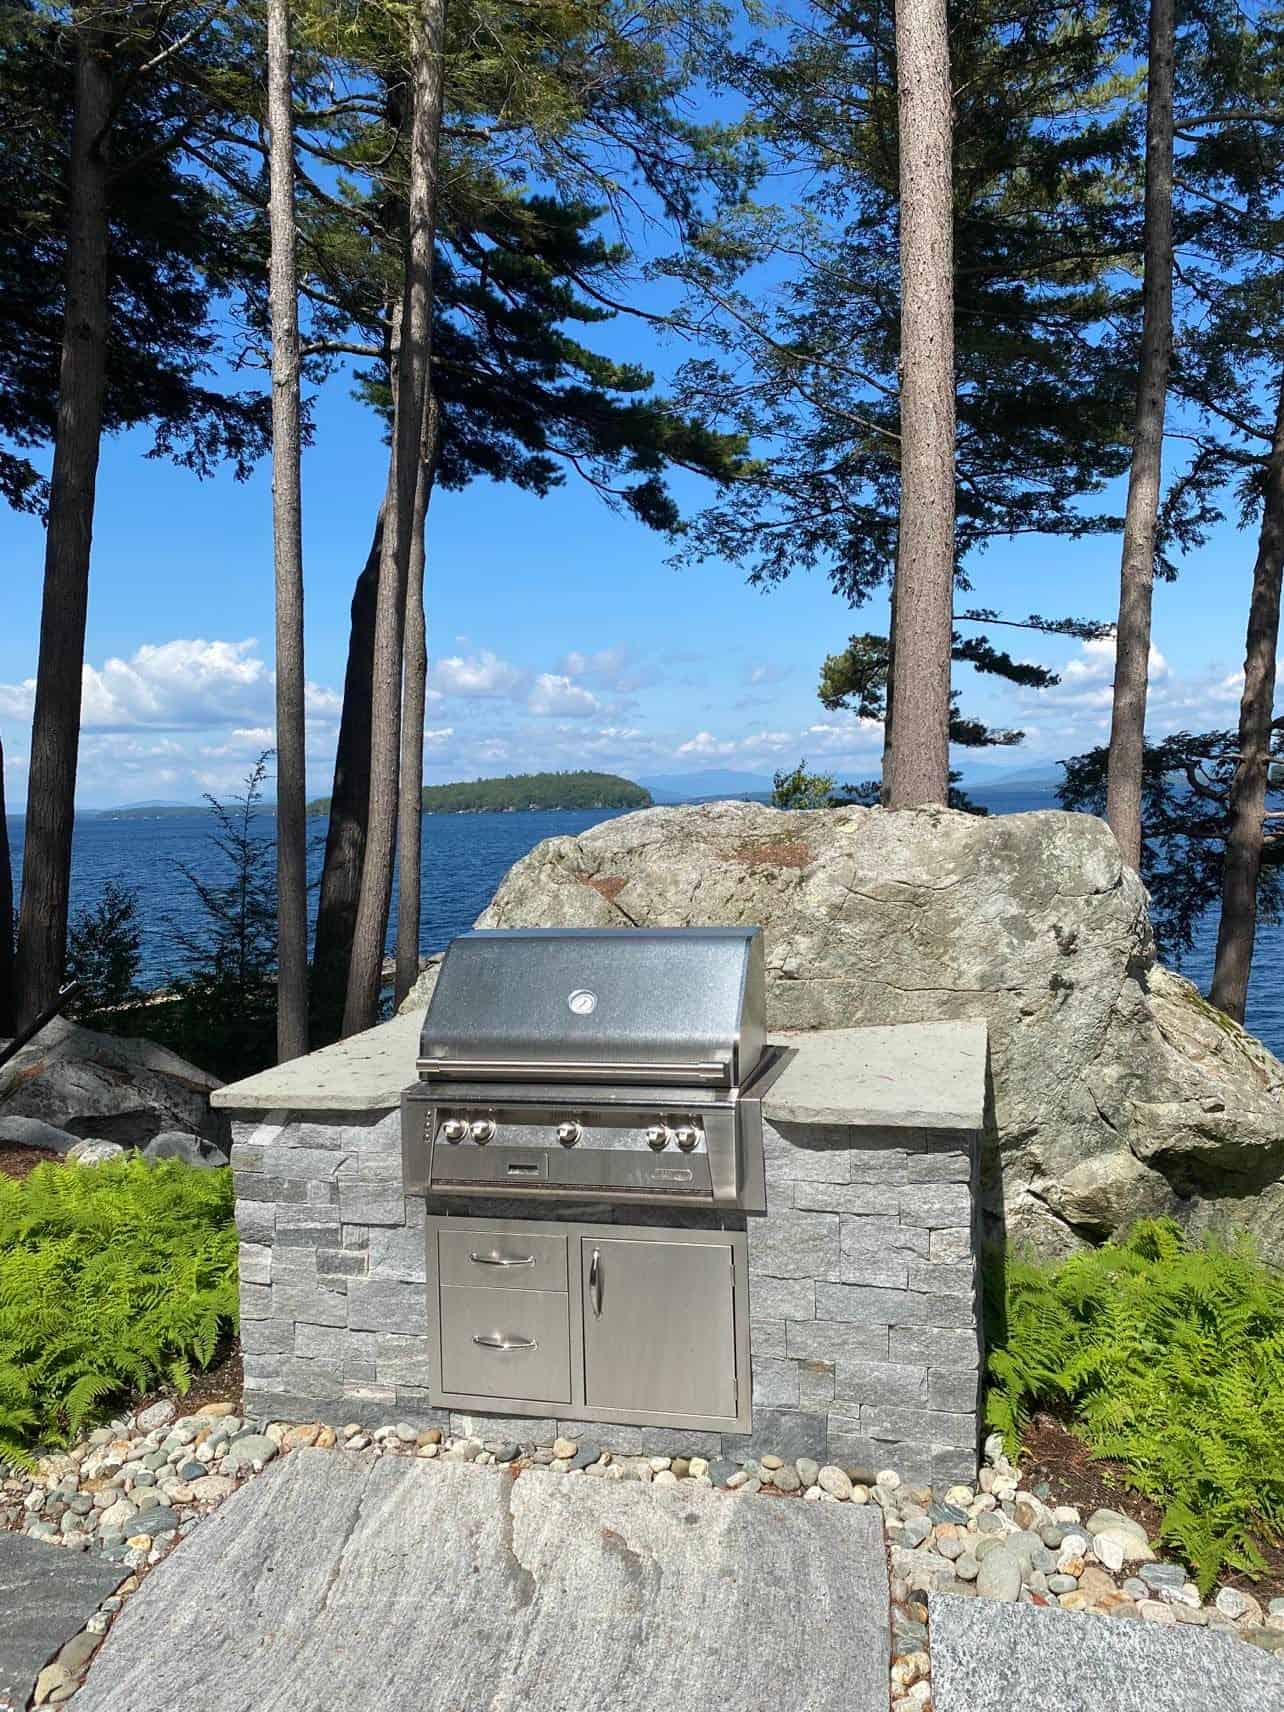
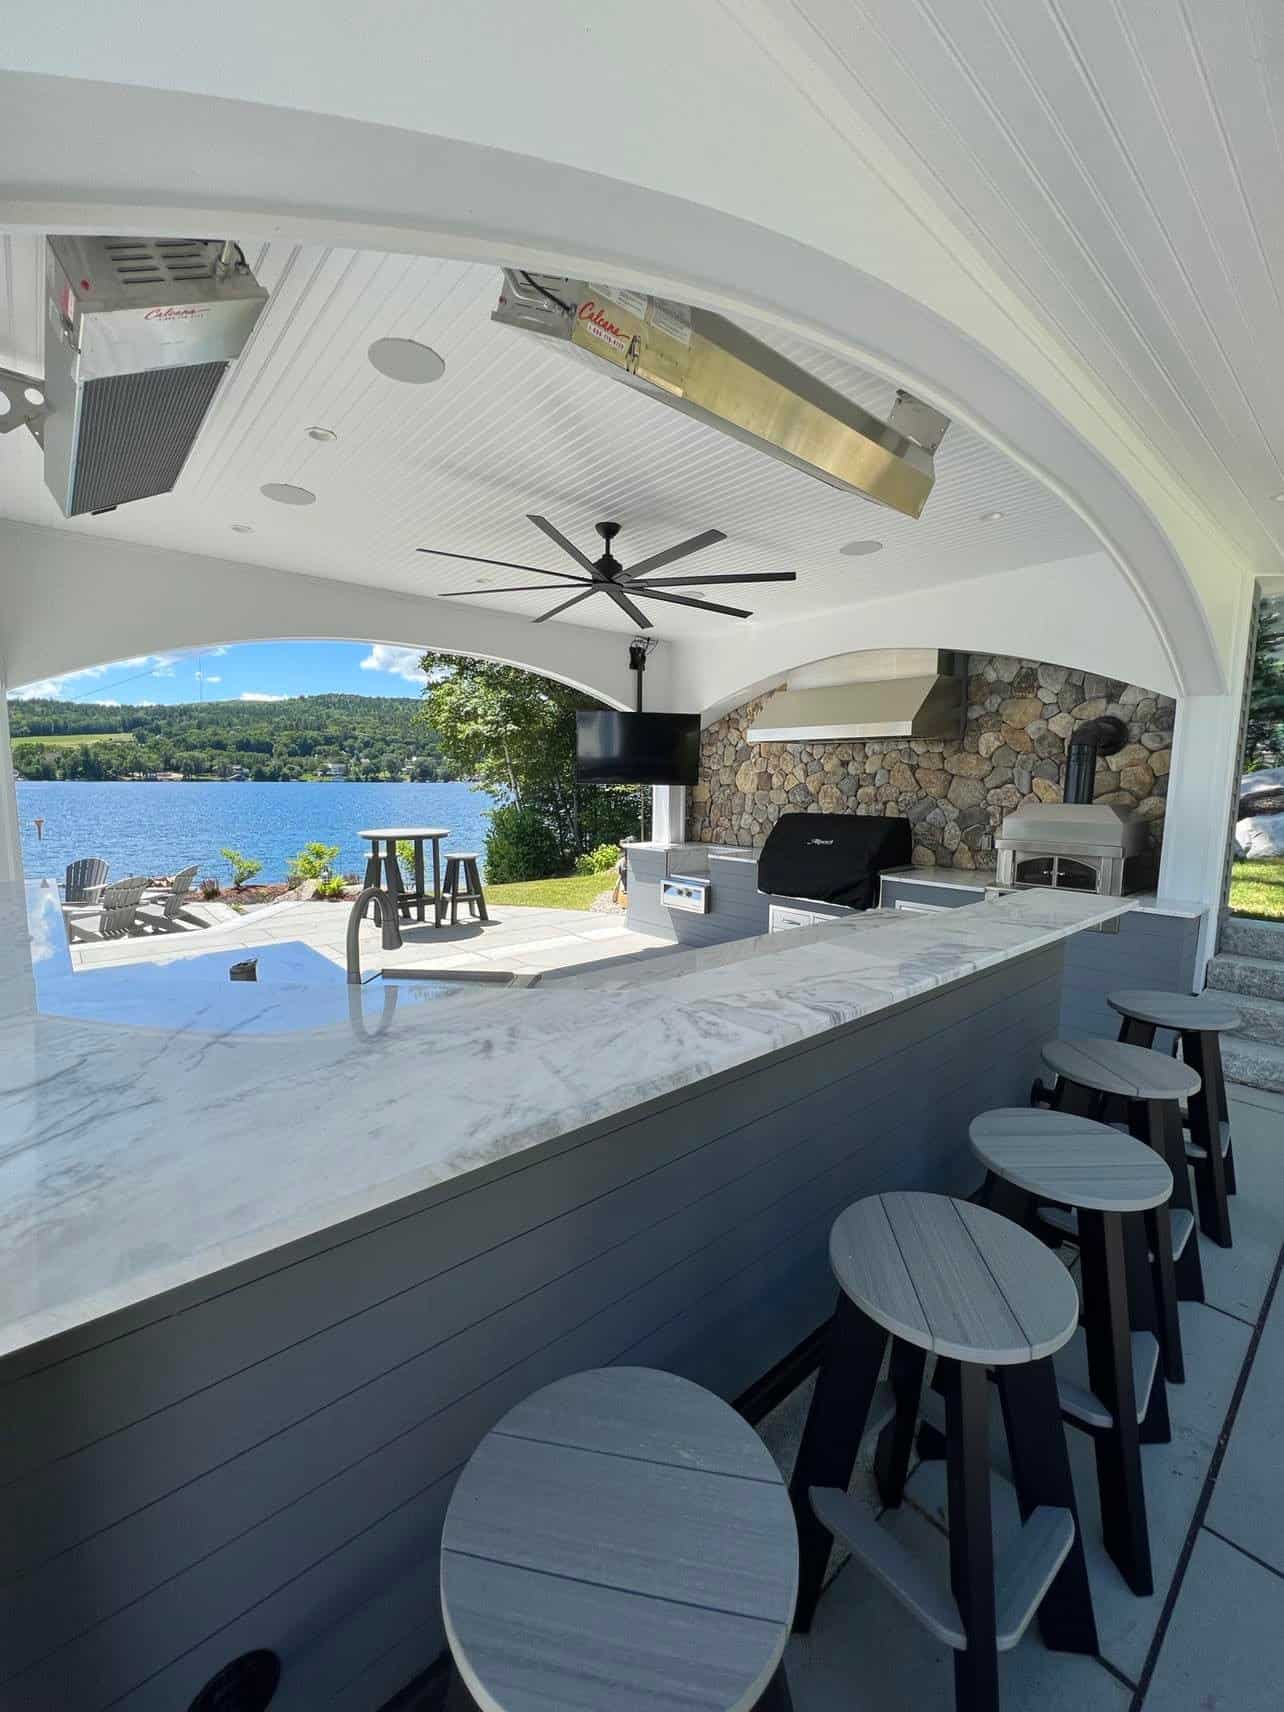
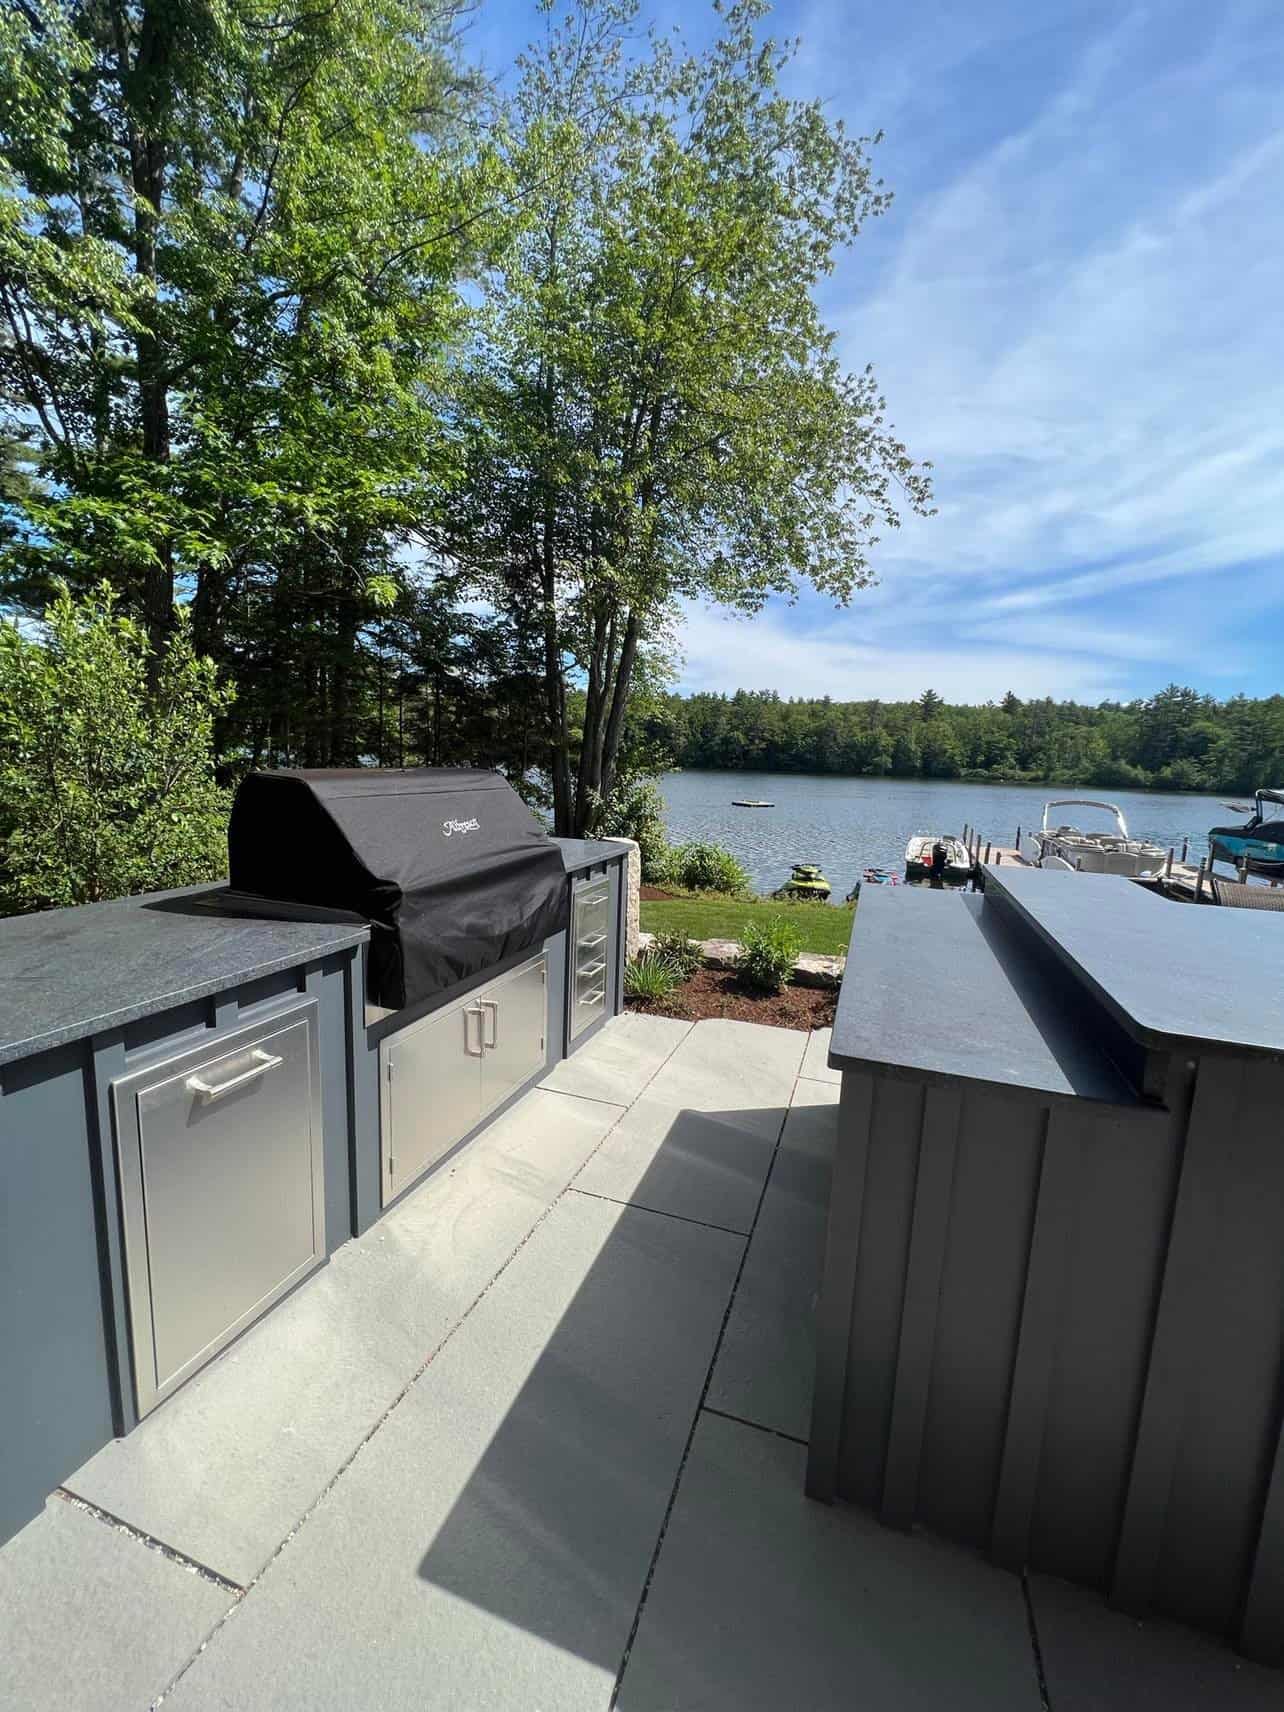
Outdoor kitchens have progressed beyond having a BBQ grill and mini fridge tucked away in the corner of the yard; many standard kitchen appliances are available in models that can be installed outdoors, so you can customize and design a kitchen that will truly fit your family’s needs and your home’s space and décor. Adding a beautiful and well-equipped kitchen greatly increases a property’s value; some homes have seen a return on investment of 100%-200%.

Create a Plan

Once you’ve decided an outdoor kitchen is right for you, you need to start by figuring out what you primarily want to do in this kitchen. It’s easy to get carried away while dreaming and designing, and as with every renovation, the costs can add up quickly.

Think about how your family eats, and how much you entertain. Will you need a brick pizza oven, or will a steel one do? Or do you need a pizza oven at all? Will you need taps in your wet bar, or will a built-in ice chest for chilling beverages suffice? A large grill is great, but will you need a roasting spit? Do you need a small grill or fridge, or larger ones?

There are so many appliance choices available, so taking time to think about how you use your outdoor space is really the best first step. You can fill your shopping list with “must haves” from there.

Choose a location

Think of an outdoor kitchen as an extension of your indoor kitchen. It should be located close to your indoor kitchen, if possible, to make the inevitable trips indoors to grab ingredients, pots and pans, etc., easier on the chef. The kitchen should be designed to keep the chef part of the outdoor activities, so as you’re choosing your location, allow space for seating in and around the kitchen area itself.

Consider how this kitchen will fit into your décor. Ideally, you’ll want this kitchen to be built with any stonework that already exists around your home, so you can match or complement the patio tiles or wall masonry. Will you be able to extend your roofline to cover this kitchen, or would you prefer this kitchen to be under an awning or located in a pergola or separate structure? The kitchen’s location would be best situated in a spot that’s at least partially shaded and away from the wind, to make it a comfortable spot for cooking, eating, and entertaining.
Kit it Out

Once you’ve thought about what you want to do with the space you’ve chosen, how your family eats, and how you want to entertain, now, it’s time to go shopping. There are so many choices available for outdoor kitchens when it comes to appliances and fixtures. Here are some quick “shopping” lists to help you consider:

Cooking

  • BBQ Grill
  • Pizza Oven
  • Roasting Spit
  • Smoker
  • Warming Drawers
  • Gas Side Burners
  • Gas Griddles
  • Hood Vent
  • Proper venting for Gas Appliances

Cooling

  • Refrigerator
  • Ice Drawers or Bins
  • Wine Chillers/Fridges

Wet Bar/Beverage Center

  • Sink
  • Blender
  • Kegerators
  • Taps

Standard Kitchen Necessities

  • Countertops/Prep surfaces
  • Sink
  • Dishwasher
  • Storage Cabinets, Drawers and Shelves
  • Trash/Recycling
  • Pantry Storage
  • Compost Bins

Entertainment & Comfort

Material Considerations

Choosing the materials for your outdoor kitchen build is like designing your indoor kitchen, but with one extra consideration: this kitchen must withstand the elements across all four of New England’s seasons. During the hot summer months, you must be able to touch surfaces without getting burned, and surfaces must be able to withstand the cold, snow, and sometimes abrupt changes in temperature we experience throughout the year.

For countertops, consider surfaces that are easily cleaned and that won’t readily show burn marks if hot pots get put down on them or show stains if something is spilled on them. Choices include:

  • Granite is always a good choice (we are the Granite state after all), but since granite gets hot in the sun, use it in shaded areas. If you must use it in the sun, choose a light color.
  • Quartz is another popular choice for countertops in indoor kitchens, but it will yellow in the sun and can’t stand up to our freeze/thaw cycles, so damage can occur.
  • Concrete is a good option and can be beautiful, but keep in mind that it needs to be sealed every couple of years.
  • Soapstone is beautiful in kitchens, but it scratches easily, and any oil will leave a stain.
  • Metal will be too hot to use as a countertop outdoors, and with our humidity and snow, will corrode quickly.

For cabinets, consider building cabinet frameworks out of stonework or masonry that matches your existing masonry or tiles. You can use stainless steel doors and cabinets that are nestled right into the stonework. If you prefer wood, there are many options that work well outdoors too.

At Stephens Landscaping, we’ve helped many homeowners design and plan their outdoor kitchens. We’d love to help you, too. To get started, call 603.707.0630 or email us!

Let the Music Play

Landscape Design

Now that summer is here, you’ll be spending a lot of time outdoors with your family and friends. From a simple night outside enjoying your property, to hosting parties, barbeques, and other gatherings, one thing that’s always on the menu is music. In this blog, we’ll run down things to consider before adding an outdoor audio system to your property.

Bring It Outside

The installation of an outdoor audio system may help you enjoy your outdoor spaces a bit more. Music is a welcome addition to family dinners and will also help pass the time as you work the barbeque grill. Soft background music helps fill in gaps in conversations, and what party is complete without a great playlist? But you can play more than music over outdoor speakers. You can take your workout outside, practice yoga on the lawn, or listen to motivational podcasts as you putter around the yard. You can even be outside and listen to the Patriots or Red Sox games, so you never miss a minute!

Getting Started

As you can imagine, an outdoor audio system is different than an indoor system. An outdoor system usually covers a bigger area, and its components need to withstand the elements. While you may use the system primarily during good weather, it needs to survive outside in all kinds of weather conditions.

To get started, you’ll need to decide:

  1. What kind of sound do you primarily want outside? Do you want music for parties, for soothing background “white noise”, or sports broadcasts? What do you want to be doing outside when you sound to accompany your activities? Of course, you can choose more than one option, but what were you imagining listening to when you began to think of installing an outdoor sound system?
  2. Where do you want to hear the sound? Do you want to primarily hear the sound in a patio area? Or do you want music by the pool, too? How about music around an area of your lawn, or even the entire perimeter?
  3. How do you want to control the sound? Do you want to hook outdoor speakers up to a phone or mobile device, use multimedia applications on a dedicated laptop, use an existing sound system in your house, or a traditional stereo system that showcases your vinyl collection? The quality of the sound depends on the speakers, of course, as well as the source of the music.
  4. Do you want a wired system, a Bluetooth system, or a mixture of both? It really depends on the size of the space you want to have the sound reach, and which type of sound you’ll be listening to.

Map Out Your Plan

Like any addition to a well-maintained landscape, you’ll need to plan where you want to install your equipment. While the controls will remain inside your home or pool house, you’ll need to map out where you would like your outdoor speakers to be located.

It’s very important to note that you cannot use indoor speakers outside; these speakers will not withstand the weather conditions outdoors; you’ll really want to get some designed specifically for outdoor use. Many quality outdoor speakers are made to be rust proof and airtight and deliver great sound amplification for the best sound quality.

Fitting in with the Landscape

Gone are the days of the big black speaker boxes that are obvious wherever you put them. Today’s speakers can be small, wall mounted and can be installed up in the rafters of pavilions and gazebos; small hockey puck sized speakers that can be placed unobtrusively amid the plantings and mulch around your yard, and even bigger speakers that are designed to look like rocks or lamps and can blend in seamlessly with your existing landscaping.

It’s a good idea to create a plan that incorporates a variety of speakers that would work best in your property, depending on their location. You could put speakers high up on the wall of your gazebo so they wouldn’t be readily seen, a couple of speakers in your shrubbery, and some lamp speakers along the pathways, for example. Again, it depends on what sound you want to reach along what parts of your property.

One last consideration—if you have an automated smart home or multi-room music system already installed, you can most likely add controls to your system to bring sound outside. Speak to your installer to see if a program or app can be added; you’ll still need to install speakers outside, of course.

At Stephens Landscaping, we’ve helped many homeowners install outdoor audio systems. We’d love to help you design and install a system that works best for you and your property. Give us a call at 603.707.0630 or reach out over email!

Perched Beach Construction

Landscape Construction · Landscape Design

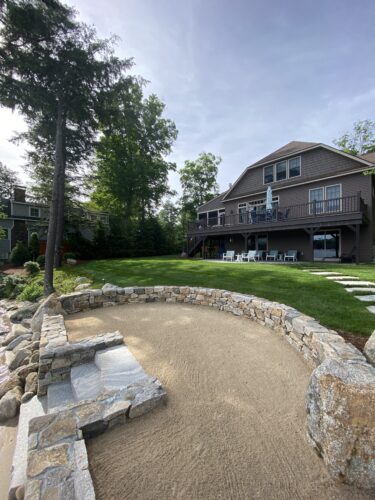
Adding a perched beach to your waterfront home expands your options for relaxation and entertainment as well as increases your property value. Installing a perched beach isn’t an easy task, but by getting guidance and following the State’s rules, you could be relaxing on your own private beach.

What exactly is a perched beach?

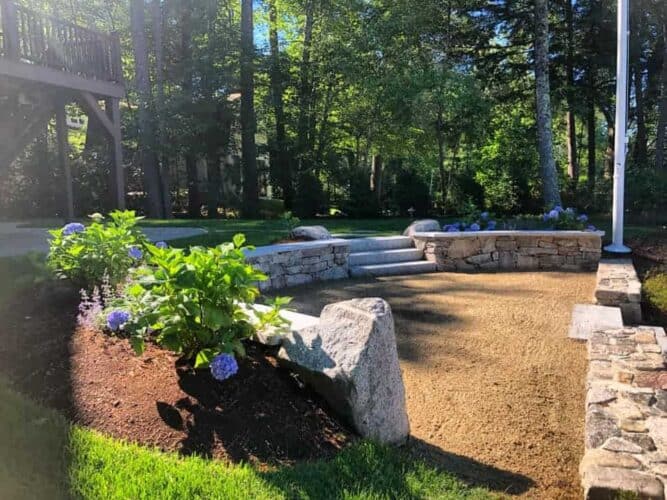
A perched beach is a sandy area that is at least 1 foot above the high-water line. It usually looks like a terraced area, with a retaining wall and steps leading from the water’s edge to the sandy area. These steps must stay 1 foot behind the high-water line. Perched beaches often need a back for supporting grade.

Love the idea, but not sure where to begin?

First, you’ll need a plan. There are many rules and regulations you’ll have to follow, so it’s best to work with someone who has experience in designing and installing perched beaches right from the beginning.

Then, you will need a Wetlands Permit from the New Hampshire Department of Environmental Services (NH DES). This permit will take at least 75 days for the State to review. It’s important to leave enough time for the process as the beach cannot be constructed without a permit.

What are some other considerations for the planning stage?

  • Your beach and other water access structures cannot be more than 20% of your shoreline frontage, so if you have 100 feet of contiguous shoreline, your beach can only be 20 feet wide, and this also depends on other existing features.
  • Be aware that you can’t build a perched beach on a slope that’s greater than 25%, calculated from the high-water line to the back of your proposed construction. However, your beach itself must be flat, and have no slope to it at all, which will minimize any runoff into the lake.
  • You’ll also want to locate your beach in an area that will impact the environment the least, where you will have to remove the least amount of vegetation, and where animals, birds, amphibians, etc. do not nest. Your beach cannot contact the water’s edge at all, and you can’t dredge the lake bottom and/or add sand to the lake for any reason.
  • Your plans must include ways to divert surface runoff around the beach to allow for sand erosion during storms.
  • Your perched beach must be 10 feet from property boundaries, unless you get permission from all effected abutters.
  • During construction, you can’t have any machinery in the water, and you can’t move any boulders along the shoreline, except to build the steps to your beach.
  • You can only use 10 cubic yards of sand on your beach, and it must be clean sand. You can only replenish this sand once every six years.

These are some of the basics to get you started with designing your own perched beach area; there’s a lot more to this process. For more information, you can contact the NH DES Wetlands Bureau by phone at (603) 271-2147, via email, or by mail at 29 Hazen Drive; P.O. Box 95, Concord, NH 03302-0095.

Let us help!

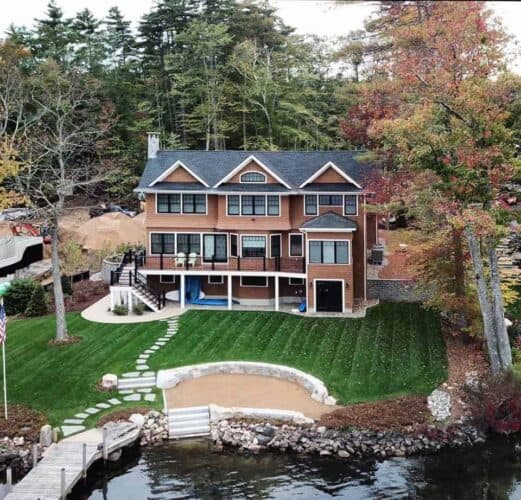
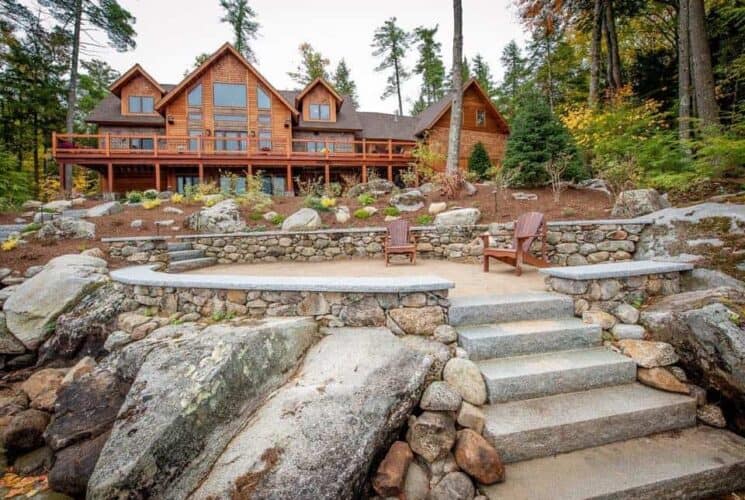
The team at Stephens Landscaping Professionals has experience in designing and installing perched beaches. Below are just a few pictures from some of the projects we’ve completed.

We’d love to help you create a beach that truly enhances your lakefront home. Reach out or give us a call at 603.707.0630.

If you’re interested in learning more about how a perched beach may improve your home’s value, contact our friends at Lake Life Realty, who will be happy to provide more information about what they have seen in their experiences around the lake.

Popular Design & Landscape Trends

Landscape Design

TAKING IT OUTSIDE

Warm weather has finally arrived in the Lakes Region and many of us are looking forward to spending more time outdoors.

While outside, you may realize your outdoor space needs refreshing, or even a complete renovation. Whether you have an established space that needs updating or you’re starting from scratch, there are many things you can do to make outdoor spaces comfortable, functional, and welcoming.

A MATTER OF SPACE

The first step is to consider what you want to do with the space—what do you want to use the outdoor space for? What will happen the most out there?

Outdoor spaces are often used as places of refuge, where people go to read and relax, and become one with nature; they can be great exercise spots or peaceful meditation gardens. One of the most common uses for outdoor areas is a play space for the whole family. There are many customizable play-sets available at differing price points, depending on age and interest levels. Larger areas could accommodate putting greens, bocce courts, or small disc golf courses.

Once you determine how you would like to use the space. With a little planning, you can make your deck, patio, or backyard an extension of your home. If you already have a deck, you can enlarge it on the same plane, or add levels. Adding on to a patio will give you more space to work with. A backyard redesign or upgrade will give you the most opportunities to create a space that will suit your needs.

Some people use outdoor spaces as an extension of their living room, and furnish it with rugs, décor, and comfortable furniture. Others use this space as an outdoor kitchen or entertaining area. Grilling areas can be expanded to include preparation, storage, and counter space, as well as dining. Larger cooking areas may even include pizza ovens or a bar and lounge area.

BUILT FEATURES

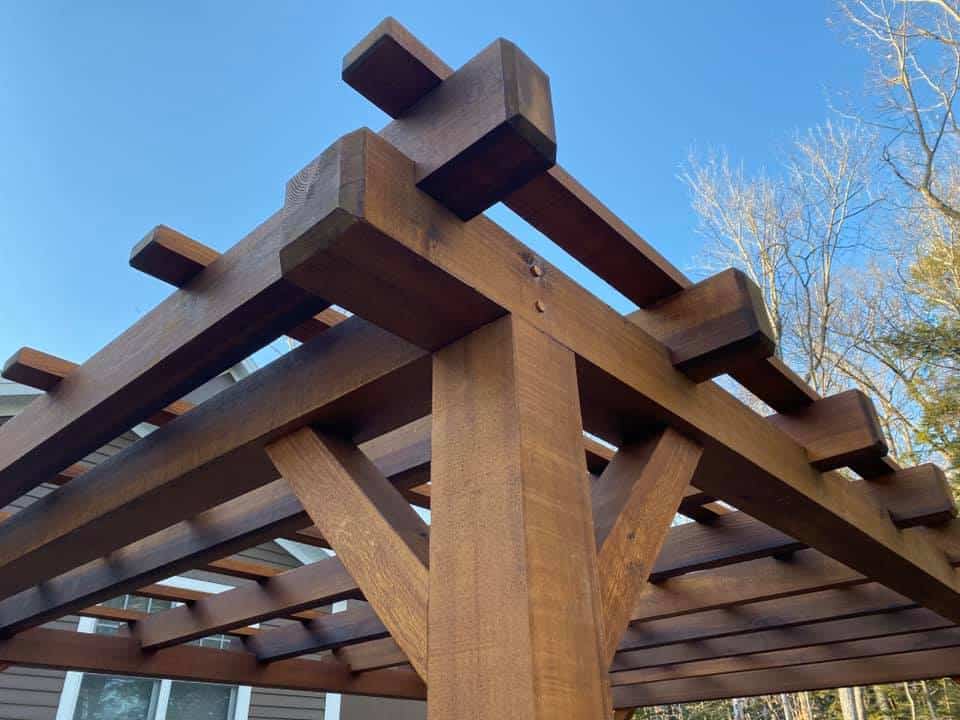
A popular and useful structure for any outdoor space is a pergola, pavilion, or gazebo. What once started as garden follies are now available in many configurations, materials, and price points. These structures offer additional opportunity to incorporate beautiful landscaping and plantings to increase natural beauty and add visual interest to your landscape.

In conjunction with garden structures, a fire pit is a great addition to any patio or back yard, perfect for relaxing at night, and making s’mores.

Another great addition to an outdoor space is the inclusion of a water feature. Some ideas include a fountain or koi pond; a pool, either above ground or built in; or a hot tub or spa.

Plantings play a big part in making your space the most inviting. We can work with you to develop a plan that will not only look good in your available space and accommodate your specific needs, but that will also make the most sense with our climate and growing season in the Lakes Region.

HOME BENEFITS

Thoughtfully designed outdoor areas can give you years of enjoyment, as well as increase the value of your home. Many people see an increase in their property values, as a return on investment for upgrades made to outdoor spaces. For more information about what a good outdoor space can do for the value of your home, contact our associates at Lake Life Realty.

WE CAN HELP

There are as many options as there are ideas for creating or refreshing outdoor living spaces. We have created some beautiful and functional outdoor spaces and would love to help with your plans. We’ll work closely with you to design a plan that best fits your space, design aesthetic, and budget. We’re excited to see what you have in mind. Contact us today!