Falling in Love with Fire Features

Landscape Construction

Fall is arguably the most beautiful time of year in northern New England, and so it makes sense that many of us want to extend our time outside and enjoy the great weather, beautiful foliage, and cool nights that this season brings.

One way to add to the enjoyment of staying outdoors as the temperatures dip is to add a heating element to your outdoor spaces. You can add a decorative touch as well as a heating option by choosing a fireplace or fire pit. Both are wonderful additions to your outdoor areas and put out about the same amount of heat but have different things you should consider.

A Heated Focal Point

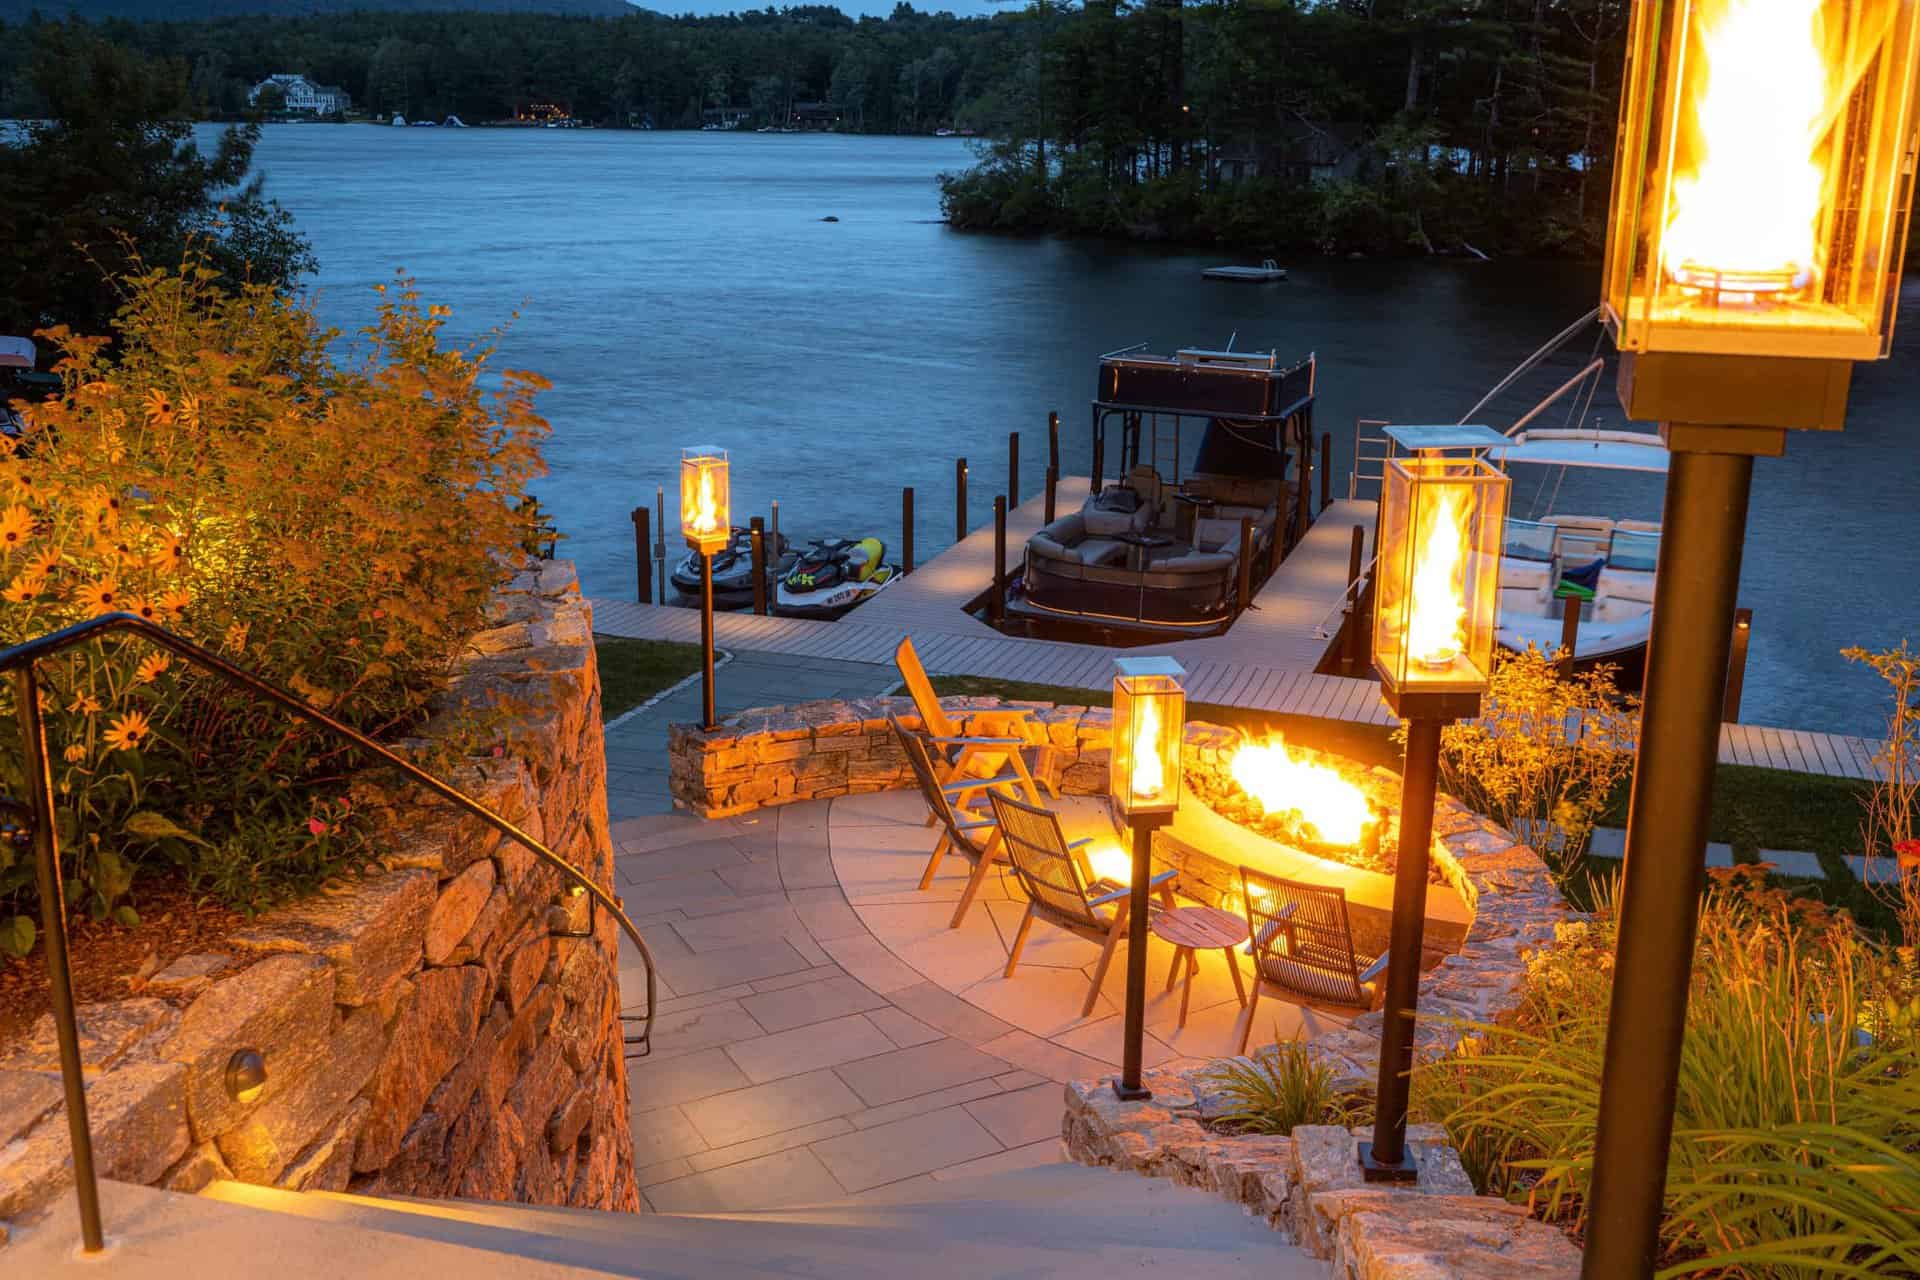
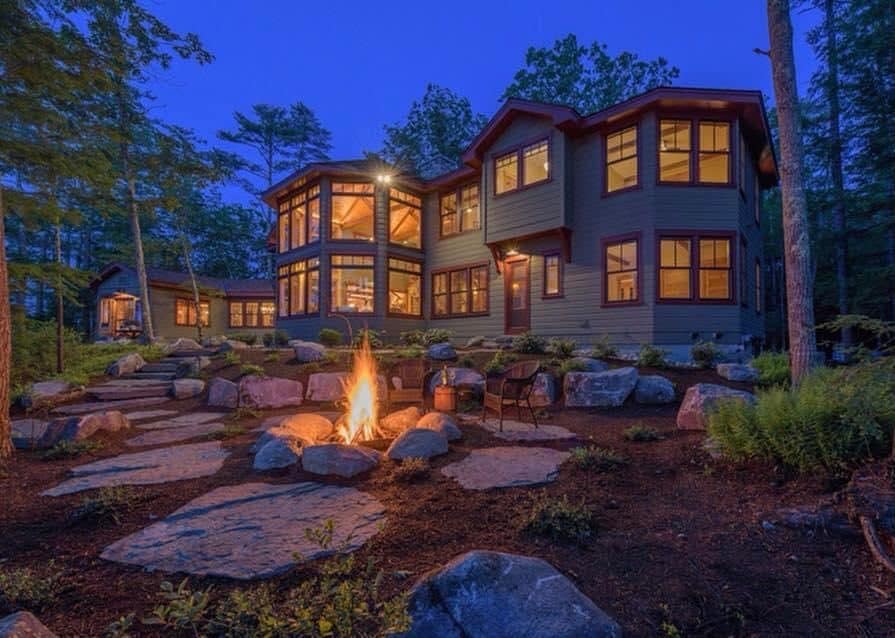
When you install a fireplace or fire pit on your property, it becomes a focal point of your landscape and a natural gathering spot that’s perfect for entertaining and socializing with family and friends. It’s a casual place to hang out and chat or unwind after a long day. It’s easy to sit around a fire and sip cocktails or roast marshmallows to make s’mores (or both!).

A fire element adds warm tones of light to your landscape and provides a good “wall” at the end of a patio or seating area, especially if you install a fireplace. A fire pit can help you create a new seating or conversation area if you want to break up a large expanse of lawn or use a previously unused/underused corner more efficiently. A more permanent fire element, like built-in fireplaces or fire pits, can increase your property value as well.
Fireplaces

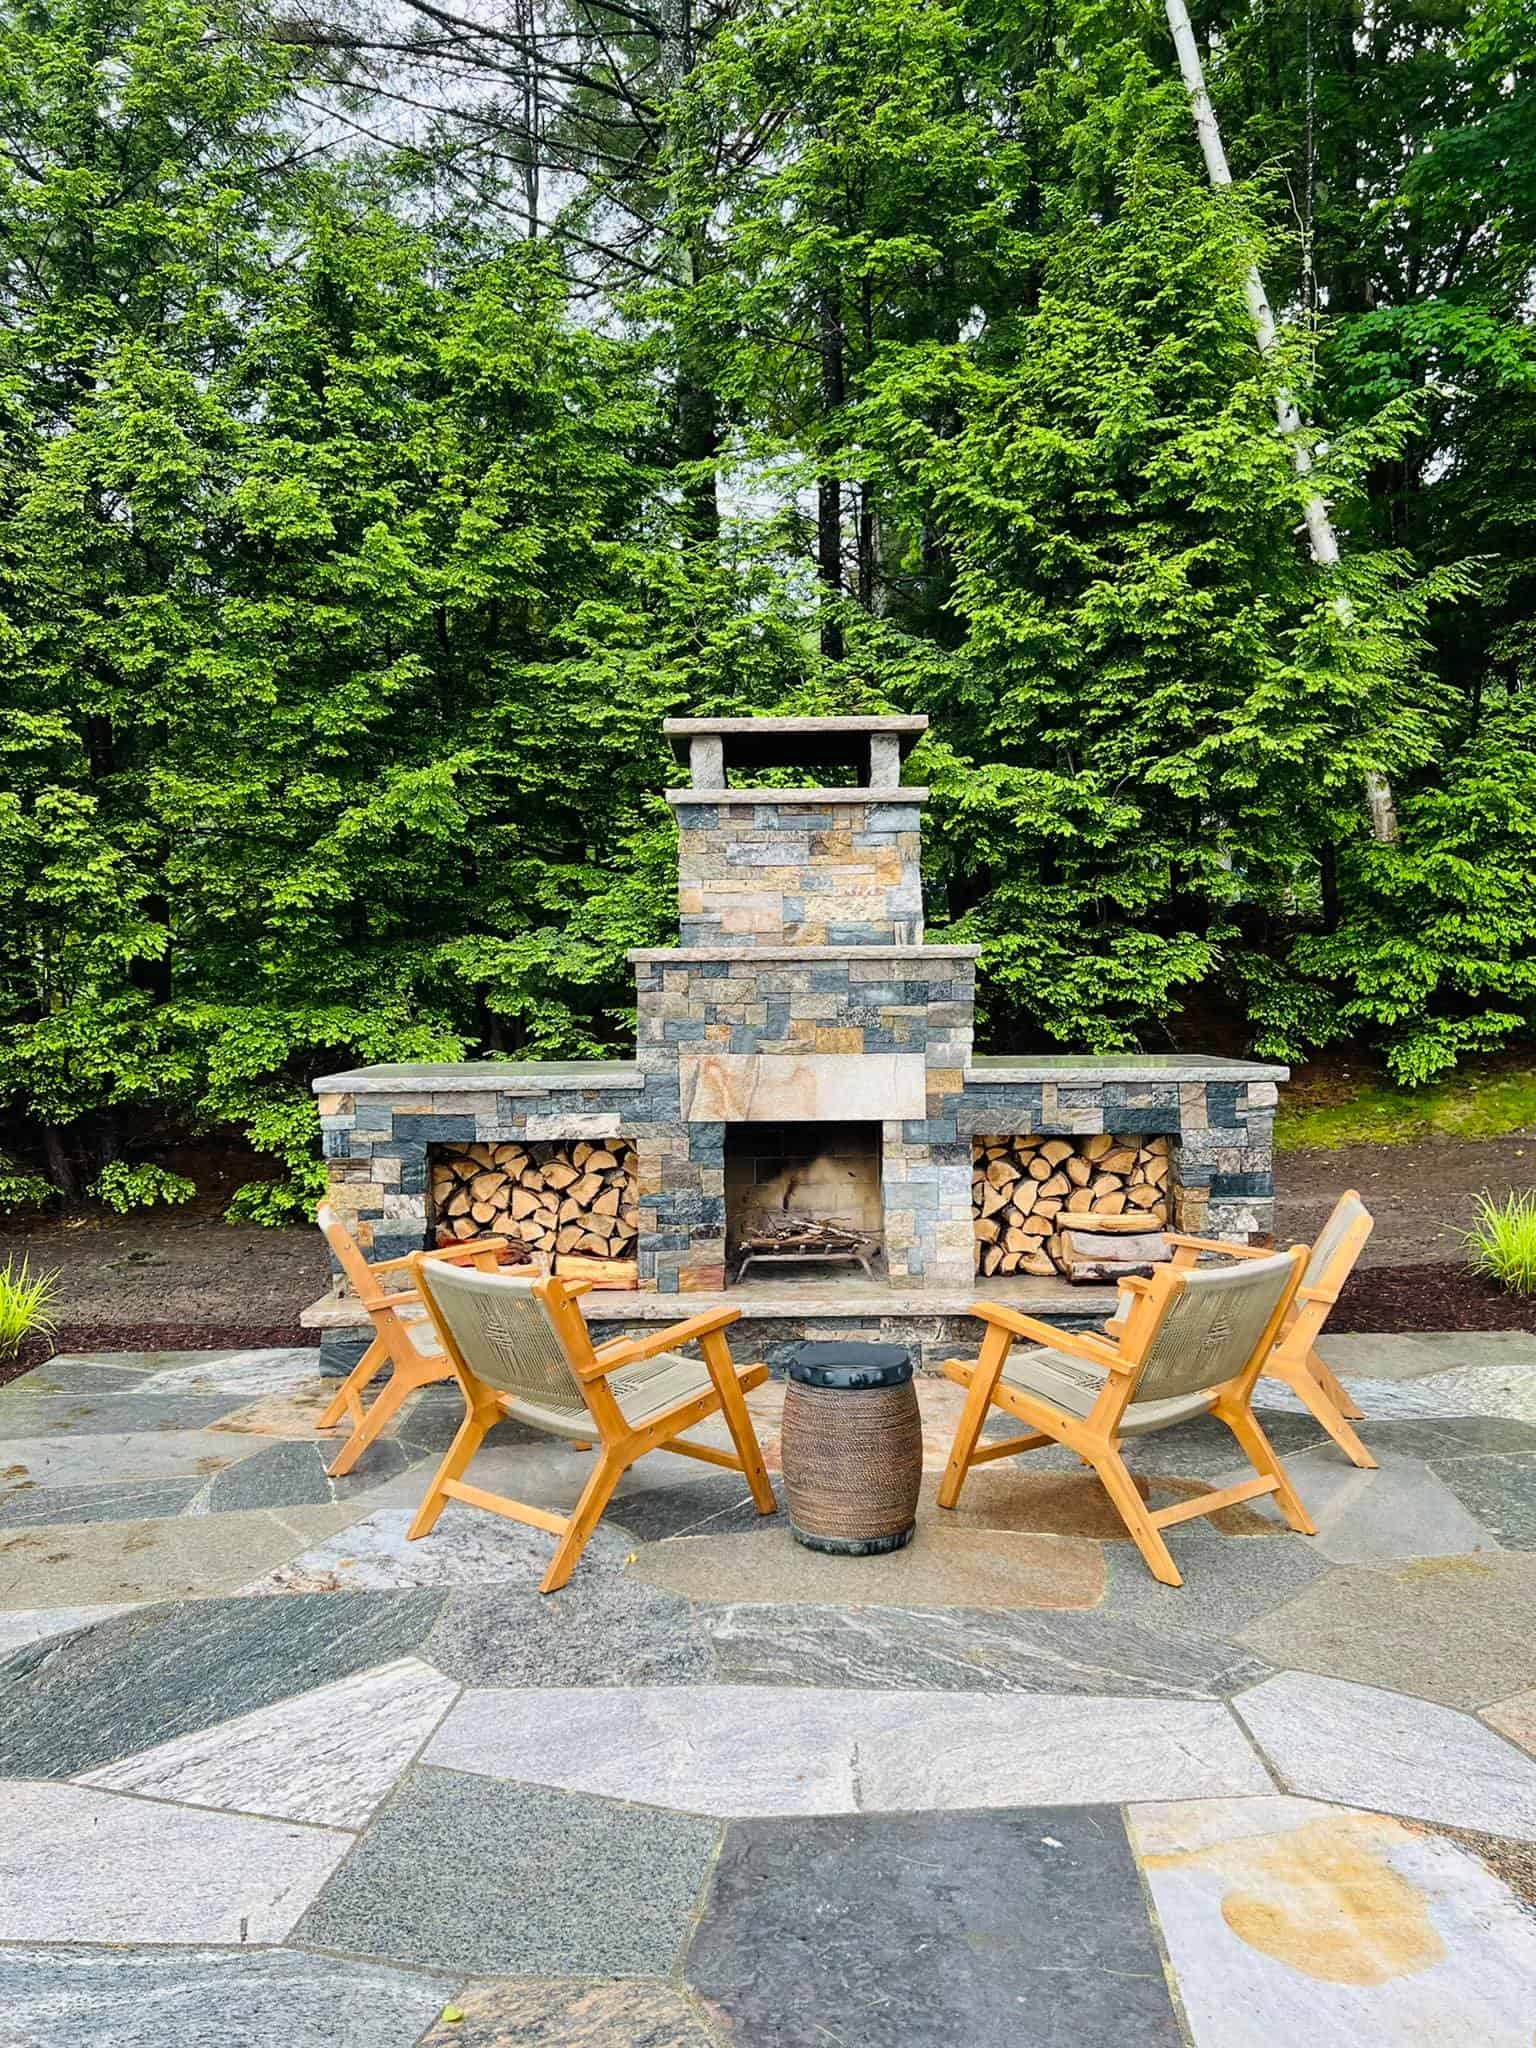
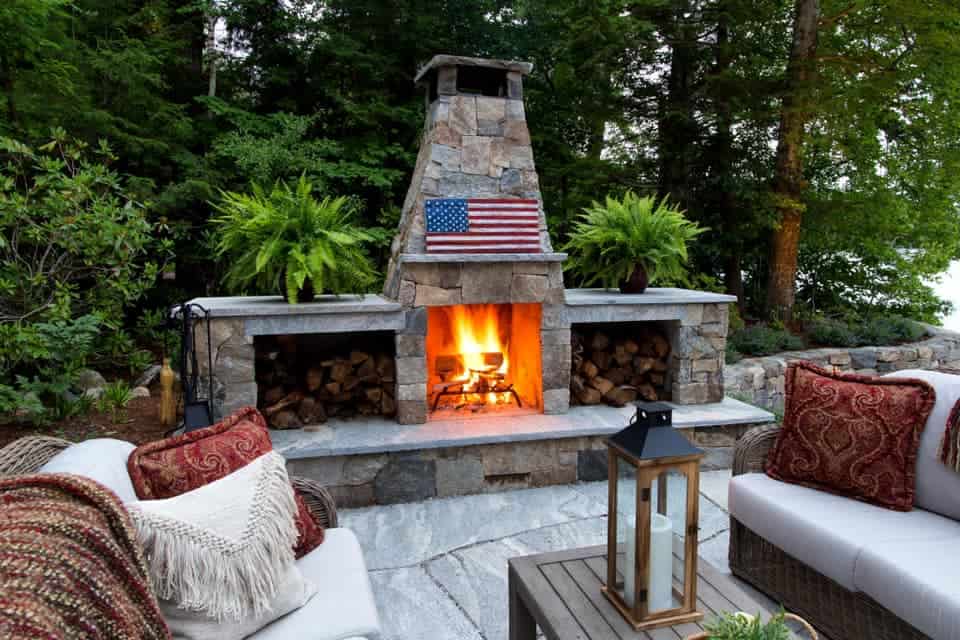
By matching or complementing existing masonry to your fireplace addition, you’ll extend your patio and entertainment space. You can opt for a wood-burning fireplace, or if you already have gas as a heating or cooking element in your house, it’s not difficult to have a gas line run outdoors for a fireplace. When installing an outdoor fireplace, just make sure to build one with a large enough chimney to be able to get a good draft for ventilation.
Firepits

Sitting around a fire pit evokes almost the same feelings as gathering around a summer bonfire on the beach or a campfire in the woods. Usually circular or square in design, a fire pit allows people to gather around all sides. Fire pits can be portable or built into patios as a permanent fixture.

Fire pits have several options to fuel their fires. Wood is traditionally used in fire pits and provides a nice flame and heat. With open wood fire pits, wind is a consideration. When placed in a windy location, the smoke produced by traditional wood burning fire pits can shift onto you, your guests, or toward your house at times. Debris and dirt may be more visible, and you may need to drain rainwater from it often. With wood, you’ll need to have storage nearby to keep your wood dry.
Great Fire Pits

If you are warm to the idea of wood-burning fire pits, there are some smoke-free options. Two companies we recommend are:

  • Solo Stove: This portable firepit offers a great burn with almost no smoke. It’s designed to maximize airflow and has air vents placed in strategic areas. You may get a little smoke when lighting or putting out the fire, but that’s about it. The trick is to keep wood below the secondary air vent and not overfill it, then you’ll enjoy a great fire without being bothered by smoke.
    Their stainless-steel design fits well into any décor and allows for easy cleaning. They also offer a lifetime guarantee from any manufacturing defects. Solo Stove also makes a matching pizza oven.
  • Breeo fire pits are another company that offers smokeless, portable fire pits. Breeo’s pits come in several design, glass, and color options. You can even custom design your fire pit on their website, so it’s built to your own specifications. Breeo’s fire pits are smokeless due to raised air vents on the bottom of the pit, enabling oxygen to feed the fire regardless of ash build up. Their double-walled build allows hot air to enter from vents at the bottom and escape at holes in the rim at the top. This escaping air causes a secondary ignition of flames, burning off the rising smoke.

Breeo also offers accessories like fireside furniture and implements you can use to cook directly on the flames themselves. As with all fire pits and fireplaces, make sure to clean all debris, drippings, and food particles completely off before relighting the fire.

Other Fuels for Fire Pits

Propane and gas fire pits are other options for fueling fire pits if you don’t want to bother with wood. Both gas and propane fire pits have instant ignitions, so you don’t have to mess about getting a fire started. And both can be shut down instantly without waiting for flames to die down or embers to cool.

There are no sparks emitted from a gas or propane fireplace, so these types of fire pits can be a safer option. To avoid carbon monoxide build up, both gas and propane fire pits must be used in well-ventilated areas.

We’ve helped many homeowners add a fire and heating element to their landscapes and outdoor entertainment spaces, and we’d love to help you come up with ideas to incorporate a fireplace or fire pit into your property. Please call us at 603.707.0630 or email us to get started.

Fall into Planting for Spring

Planting

When winter gives way and spring is on the horizon, many of our thoughts turn to our gardens, lawns, and planning what to plant in the coming year. But, from a landscaping perspective, fall is a much better time to plant anything but annuals or plants too delicate to survive our cold winters.

It may seem strange to plant when the usual growing season is winding down, but by planting in the fall, you’re giving your plants a better chance of survival. Then in the spring when your plants start to grow, you’ll be ahead of the game and your landscaping will look great in a shorter period of time.

Why plant in the fall?

When plants grow in the summer, many factors—hot temperatures, varying humidity levels, drought, or occasional periods of heavy rain—tend to add stress to plants. In the fall, the soil is still warm enough to nourish growing plants, and the more moderate temperatures and increased rain will give your plantings a healthy, stress-free start.

The cooler air temperatures in the fall mean that the plants will not waste a lot of their energy growing upward. Instead, they will focus their energy downward, establishing strong root systems before going dormant in cold weather. When spring arrives, your plants will already have a strong foundation from which to grow, making them hardier for the growing season, and giving them a better chance for survival.

As you’ve watched over your lawn and gardens through the summer, you’ve undoubtedly lost some plants or found some trouble spots. Autumn is a great time to work on those problem areas.

It’s also the perfect time to add shrubs and trees specifically for winter interest, and add a bit of color to our usually stark and colorless landscape. Trees like basswood/linden and spruce trees prefer to be planted in the fall and do really well in cold weather. A hawthorn tree will produce beautiful white flowers in the spring, and by planting a maple tree, you’ll get beautiful colors on the leaves next autumn. The Japanese maple, a garden favorite, does best when planted in the fall. Really, most any tree or shrub that will grow in our New England environment can be planted in the fall, and these trees prefer to have the extra time to root themselves deeply before the summer growing season.

As for personal comfort level, planting in the fall is a bit more pleasant as the cooler temperatures make it easier to work outside on your property without the bright sun and high humidity of summer months. An added bonus to working in the garden in the fall is that fewer weeds will grow, and there will be fewer insects and pests to deal with.

Planning for Spring Beauty

There are a great variety of things you can plant now to give you early pops of color in your spring yard. Plants like tulips and hyacinths need cold temperatures before they will bloom; crocuses, winter heath, and snowdrops will bloom through the snow. Lilly of the valley and bleeding hearts will add early color to your garden, as will peonies, pansies, and violets. If deer are a problem, consider planting things that deer do not like to nibble on, like grape hyacinths, daffodils, or anything from the allium family.

If you’d like to add a bit of greenery to your landscape, select a cold-season turf to help the bare or brown spots in your lawn, or add trees and shrubs to your property for added interest.

Plan to get all plantings in the ground about six weeks before the usual date of first frost, and mulch your plants before the nights get too cool, which will protect your plants even further. And all your landscaping needs a good fertilizing this time of year to get it ready for winter, so be sure to add a little extra to your new plants for some TLC.

Extending the Season

If you are not quite ready for the growing season to be over, there are some plants you can plant in the fall that will be ready to harvest until the winter, and even through the cold months. (Just make sure to plant them six weeks before the first frost.) Some cold tolerant plants that can be grown in our zone include:

  • Lettuce (it can grow after a little snow or frost)
  • Broccoli
  • Cauliflower
  • Spinach
  • Carrots
  • Cilantro
  • Turnips
  • Peas
  • Radishes
  • Kale (will grow all through the winter)

Let us help you prepare your landscaping for fall and the growing seasons beyond. Give us a call at 603.707.0630 or email and we’ll work with you to come up with a plan to get ready for spring and beyond.

Water and Your Landscaping

Landscape Maintenance

In this month’s blog, we’ll discuss how to deal with the water conditions of your property: having not enough and having too much.

Dealing with Drought

If it hasn’t rained for a while, look for signs that your landscaping is experiencing water stress—plants with stunted growth or brown or yellow leaves, trees dropping leaves and have some dead branches, plants in the garden may not have flowers or start to seed early, and your lawn may start to show footprints or can’t “bounce back” after you walk on it or may even begin to show brown spots in some areas.

If a drought is coming, there are steps you can take immediately to minimize the damage:

  • Add mulch to garden areas and bare spots. Mulch keeps areas cool and traps moisture.
  • Don’t add any new plants; instead, focus your watering efforts to your existing landscape.
  • Don’t fertilize your plants or lawn. If you must fertilize, cut the amount of fertilization by half. Your lawn and plants are trying to survive, not grow. Fertilization is not needed at this time.
  • Pruning is not necessary, but remove dead branches and leaves, stalks, etc.
  • If plants look like they are going to die, remove them. Try not to waste water on something that will not make it through the drought.
  • Pull weeds. Eliminating weeds will cut down on unnecessary water usage, and your landscaping will look better.

When mowing your lawn, don’t mow too short. Keeping the blades long will shade the soil, reduce evaporation, and minimize any heat damage that may happen during the drought. Consider leaving the clippings on the lawn to help protect it and return nutrients to the soil.

If the drought is really bad and it looks like it will continue, consider letting your lawn go dormant; most grass is drought resistant and will recover when a steady supply of rain returns.

If you have ornamental plants around your yard, consider how long is left in the season. If it’s an annual, is it worth keeping them alive? If the season is almost over, it might be easier to let them die. If you’ve planted shrubs and trees in the past one or two years, they are more susceptible to being lost. Focus your watering efforts on new plantings, those plantings that are expensive to replace, or anything that you’ve planted that has sentimental value.

How to Water During a Drought

Once a drought is firmly established, soil will begin to harden and get impacted. Add water slowly so it gets absorbed instead of running off. A good way to make sure water gets absorbed well is to use soaker hoses. After running for an hour check that water has penetrated down about an inch; if not, run the water longer.

It’s best to water on a schedule, and to water in the early morning. This will stop the water from evaporating and allow time to soak in the soil. Do not water at night; wet grass overnight can cause fungus to grow.

If you have an irrigation system, it’s best to use a timer. Some irrigation systems can connect to your home’s Wi-Fi to monitor weather conditions. These systems control when and how you water your property and respond to water, weather, and soil conditions to deliver the right amount of water at the right time.

Water, Water Everywhere

What if we’re having a rainy summer and we’re experiencing the opposite problem? If you have noted areas of your lawn or garden where water pools, there are things you can do to avoid erosion and have your plants or lawn die from too much water.

One thing you can do is aerate your lawn to assure water is penetrating the dirt’s surface. By doing so, you’ll direct water to the roots of your grass, which will make it stronger and more lush when the rain stops. And it’ll make the soil less compact, allowing it to drain easier.

Make sure your gutters and downspouts are clean, so the runoff doesn’t create erosion around the foundation of your home, garage, or other outdoor structures and buildings.

When planning your landscaping, be sure to properly grade your lawn, garden, and flower beds. And choose plants that love water—ask us if you’re unsure.

For existing landscapes, add soil and grade the surface away from your home. Consider adding terraces to your landscape to help water run down slopes. Prune your landscaping to allow sunlight to dry areas.

For areas that always seem wet or are susceptible to pooling, you might have to install a drain, or consider changing the layout to a hardscape. You can add a permanent water feature and incorporate that area, like a pond, water garden or even a meandering stream with a bridge to your yard.

At Stephens Landscaping, we have a lot of experience helping homeowners come up with a plan for drought and overwatering. Let us help you and your landscape; call us at 603.707.0630 or contact us today.

Making the Most of Mulch

Landscape Maintenance

Mulching has been favored by gardeners and landscapers alike for many years, as mulching adds a nice finishing touch to well-landscaped grounds and protects plants, trees, and shrubbery. Since mulch can affect the soil beneath the mulch, it must be applied properly to not damage the root system of your plants. We’ll discuss what to consider when adding mulch to your property so you can make sure your gardens, yard and landscaping look their best year-round.

What is mulch?

Mulch is the name used for a substance that’s put on top of soil to provide protection or add visual interest to an area. When you are deciding which mulch to use in your landscaping, remember, the best mulch is an organic material, that is, it’s a substance that already comes from nature. Common mulches are made of bark/wood chips, and moss. Mulch comes in a variety of colors, so you can choose one that best complements your property features and landscape design.

Why use mulch?

Mulch has been used to add an aesthetic, decorative touch to landscapes for decades. Mulching around plantings, shrubs and trees adds a dimension of shading under foliage as well as contrast under brightly colored flowers. But mulch serves much more than a decorative purpose.

Mulch can help deter weed growth among your plantings by not allowing sunlight to pass down to them. It will help the soil around your plantings retain moisture, which is always beneficial to their growth, especially in dry periods. Mulch traps water and slows evaporation from the surface of the soil, so plants stay hydrated longer, reducing the need for frequent watering. It can protect your plants during periods of heavy rain, as it will absorb water and protect the roots; mulch will also help minimize soil erosion around your plantings.

Mulch can also help protect your plant’s roots during periods of extreme heat, as it acts as an insulator. The use of mulch can reduce the occurrence of heat damage to both the base of your plants and the surrounding soil. It will also help your plants resist pest and plant disease; in fact, organic mulches provide earthworms and micro-organisms with food, which is great for your plants and your plant health.

During decomposition, organic mulches add beneficial nutrients back into the soil, enriching your soil for next year.

Apply mulch correctly

Once you’ve decided on the “what” (type and color) of the mulch you want to use on your property, you’ll want to focus on the “how” of spreading the mulch. Improperly spread mulch can not only be disruptive to the overall design of your yard, it can also be damaging to a garden or landscape. Mulch that’s applied too thickly can be damaging to a plant’s root system and may stop water from making its way down to the root of the plant, or not allow the area surrounding a plant to drain correctly after watering or a rainstorm.

Start your mulch application by cleaning out the areas where you want to apply mulch. Take out the weeds, sticks, leaves, etc. that have accumulated over the winter months, and water if necessary. Then start spreading the mulch; it’s best to lay down mulch in a depth of approximately 2 inches.

If you’re putting mulch down around plants, shrubbery, and trees, etc., make sure to keep the mulch around three inches away from the plant itself, to help with air circulation around the root of the plant. However, if you’re mulching a vegetable garden, you do want to mulch right up to the stalk of the plant, to help with water retention. Water the whole area after mulching.

At Stephens Landscaping, we have a lot of experience with using many kinds of mulch, and we’d love to discuss which kinds and colors of mulch are right for your landscape and garden. Call us at 603.707.0630 or reach out by email.

Spring is Almost Here!

Landscape Maintenance

Spring is the time of renewal, and that means for your landscapes and gardens, too! While the official start of spring begins in March, the actual start of spring feels like it begins a little later here in New England. We still have bits of snow and ice hanging around in spots, but signs of spring are certainly beginning to pop up everywhere. This transitional period is the perfect time to start preparing your green spaces and gardens for the upcoming spring and summer seasons. Here are a few tips to get started.

Walk Around and Take it In

Before you do anything else, walk around your property and see what needs to be done. Winter can be rough on a landscape, and a lot of damage can be hidden under piles of snow. You may discover holes in lawns from burrowing animals, damage from ice on walkways, broken tree branches and flattened shrubbery, and dead spots of lawn.

Start with a Clean Slate

Once you’ve seen what needs to be done to get your green spaces and gardens ready, the best place to start is with a good cleaning. Now’s the time to remove broken branches, leftover leaves, and the stuff that the wind picks up stuff from driveways, roads, and nearby properties.

Raking your lawn is the best way to clean up any dead leaves that fell during the winter or remain from the last fall clean up. Raking will also remove the bits of grass that did not survive the winter as well as the myriad of twigs and small branches that fell during the snow and ice storms we had this season.

Clean around your plant beds and in your garden area. It’s important to get these areas ready for planting, so once the threat of frost has passed, these areas will be ready to go.

Tidy up the Trees

Early spring is the best time to lightly prune your trees and shrubbery. Heavy winter snows and ice storms are damaging to trees and shrubs, so a light pruning helps to keep them in good shape.

By pruning early, you’re also giving your trees and shrubs a healthy start on new growth. It’s best to prune before any new growth starts, because in later spring and summer, the plant’s energy will be focused on flowering and growth. Shaping the plant will also be easier when there are no leaves to get in the way of your view.

Lawn Care

Your lawn may look a little sparse and brownish this time of year. If you have bare spots on your lawn, once the weather gets a bit warmer and your lawn gets a bit greener, it’s a good idea to have your lawn spot-seeded and fertilized. You can pull out any weeds you see, before they’ve really had a chance to start growing and before you’ve fertilized your lawn.

Don’t mow the lawn just yet, though, even though you may see a bit of winter growth. The lawn has been through a lot over the winter months, and you don’t want to cut it too short while it’s growing in the early spring or you may damage its root system. Wait until it’s well-established and warmer outside before eayou begin mowing.

If you didn’t aerate your lawn in the fall, you can do it in the spring before the real growing season starts. You should also fill in the holes in your lawn at this time, if you’ve found any.

Get the Whole Area Ready

Don’t forget about your hardscapes. Sweep up the patios and verandas, uncover or bring out the furniture, and clean out the planters.

Inspect your irrigation system. If it’s warm enough, turn it on to make sure that it works properly and that there are no leaks. If you find problems, call your irrigation company before they get busy for the season.

Plan Ahead

During the long winter, and especially while tending to your property during this late winter/early spring prep, you’ve most likely thought of some ideas on what you’d like to do with your property this year. Now’s the time collect all those ideas into a plan. Decide to plant a vegetable garden or find a new spot for your existing one to see if it’ll do better. Select new annuals or perennials to bring more color to your outdoor spaces.

Visit our Garden Center in Moultonborough to see what you may want to plant, or if there’s anything new to try out. Of course, you’ll want to wait until the chance of the last frost has passed before planting anything, but now’s the time to plan what you want to plant, and where. We’ve got an experienced and creative team on hand, so be sure to ask for help or see what they are doing for new ideas.